The store will not work correctly in the case when cookies are disabled.
JavaScript seems to be disabled in your browser.
For the best experience on our site, be sure to turn on Javascript in your browser.
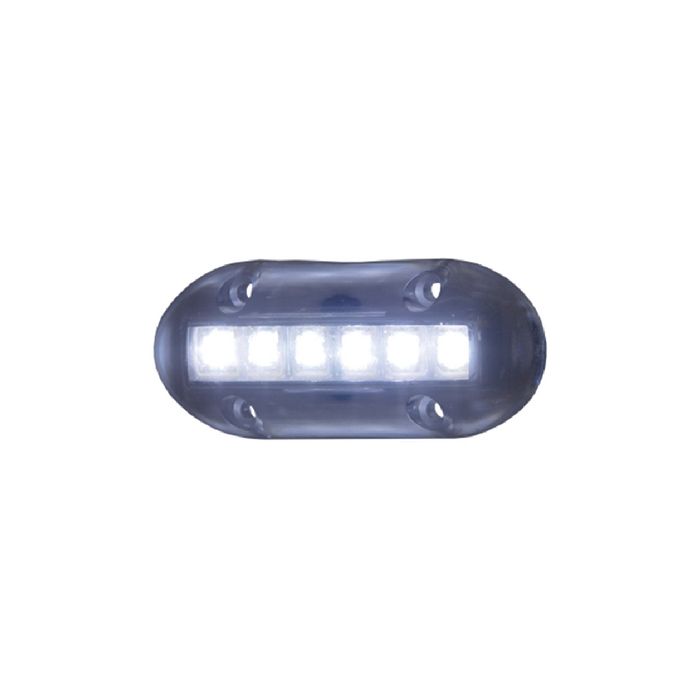
High Intensity Led Underwater Lights (T-H Marine)
Out of stock
Only %1 left
An affordable alternative for LED underwater boat lighting. These high-intensity LED underwater lights are totally waterproof and designed to be used above or below the waterline. A broad flood light effect is created by the engineered optics of the convex light face. Compared to other LED models on the market, this 180 Lumen light has greater light output and a wider aperture. Proven to attract bait fish during night trips, and add ambiance to any vessel. Stainless steel hardware included.
TH Marine Underwater LED Install
Here is a great video on installing and tips from TH Marine.... read more
VIDEO
Video Transcript
Hi. I'm Luke Dunkin with TH Marine Supplies at Huntsville, Alabama. Today, I'm going to tell you a little bit about our new LED underwater light. We're going to give you some useful tips on how to install and talk about some of the features of our new light.
Here are some of the features on the new underwater LED light from TH Marine. The light is over 600 lumens, features 6 LEDs which are available in three different colors. We have blue, green and red so three different options there on colors.
We also have a couple of mounting options. One would be a through-hole mount where you actually drill a hole, run your wire through the transom of the boat into the battery area; into the builds of the boat. The other, it comes with a mounting block to offset - you run your wire through the notch in the pad up through a through-hole in the splash wheel into thebilge area of the boat. That is probably the quickest and easiest way to mount. I would say the through-hole mount, to me, would be the cleanest way to mount that.
The light also produces zero heat compared to other underwater lights. A lot of underwater lights have to be mounted below the waterline because they get so hot; they build up so much heat. This light does not do that. So you do not always have to mount it under the waterline so you can use it under sitting in a pontoon boat, on the side of a console. Just anywhere that you would like those green and red and blue. They're very bright lights that's waterproof.
On the first step in mounting your TH Marine underwater LED light through the transom, you're going to need a drill with a three-eighths inch bit, a tube of marine grade silicone sealant and clear is what I prefer. A lot of people might use it in white on a certain boat but I like clear. You're going to have four screws that actually come with the light and you're going to need a Phillips bit for your drill after you get through with that.
Once you have your tools ready to mount your TH Marine underwater LED light, you want to go ahead and select on the transom where you want the light to go. I've chosen right below this scupper. I've got plenty of room and it's below the waterline so it's going to illuminate the water very nice. You're going to take a sharpie marker in black and I'm going to mark exactly where I want my three-eighth inch drill bit to go.
Once you've chosen the location, you want to take your three-eighth inch drill bit and your drill and drill a hole where you've marked. We're through the transom.
Now that you have your hole through the transom drill, take your marine grade silicone and add it to this rubber gasket before you insert the wire through the hole to kind of make sure your hole seals off so there's no leaks.
Next once your silicone is applied, feed your wire through the hole that you drilled like so. Then you're going to push in your gasket. Next all we have left is to drill the holes. Before installing the light, you want to drill four pilot holes for your screws to go through. Just makes it a little easier whenever you're actually putting the screw through the transom of the boat.
Before installing your screws to the screw holes, I'd like to add some marine grade silicone to the screw before putting it through just to help seal the screw hole.
Now that your underwater LED light is mounted on the transom, we're going to go inside the boat and show you how to wire it up.
Next stop - we're going to wire up our TH Marine underwater LED lights. You'll need some wire crimpers, wire strippers, some heat shrink tubing to clean up your electrical connections due to butt splices. If you don't have heat shrink tubing, you can get away with marine grade electrical tape but we do suggest using the heat shrink tubing. You're going to need butt splices and a little extra wire just in case the LEDs coming off the light itself aren't long enough to go to your battery and then we're going to have to run a wire up to the console to attach to a switch.
Now that we have the light installed, I'm going to add some link to our wires so we can reach the battery and reach the console. We're going to do that by using simple butt splice. To help clean up our splice connection here, we're going to use some heat shrink tubing to go over. All you want to do is slide it over your butt splice and then heat it with just a regular lighter. Be careful not to mess your wire. It's really going to clean up your connection.
You want to repeat this process on your negative wire as well to the desired length to run to the console or to run to the battery. So going to butt splice, an extra wire, a longer wire. We're going to heat shrink it to make it just a little bit longer LED.
Next you want to run your LEDs off of your light and attach them to a battery to get power. So we're going to attach a ring terminal, go to your terminal post just like so, fasten it down.
Next you want to run a wire up to your console to your switch. A lot of manufacturers will leave you a couple of extra accessory switches so you can hook up extra livewell pumps or something like we're doing today which is the underwater light. This is a center console so I've already fished my wire up to the center console. A lot of builders will leave you a PVC pipe with wires running through so you want to get you a snake of some kind, fish your wire up to the accessory switch.
As soon as I get that hook up, I'm going to have power to my switch; going to be able to flip on my underwater lights from a console.
The final step is to run your wires up to the console, you're going to put spade terminals on your wires and attach to an accessory switch. If you don't have an accessory switch, you can buy an aftermarket switch and go ahead and mount it somewhere in the console. But in this particular boat, we're able to run to one of the the existing accessory switches. So now, we added our spade terminals, put them on our switch and we're good to go. We're ready for power.
We're all finished with our install on our underwater LED light. Hopefully, we've provided some information that will be helpful to you when you go to install one of your own in the near future. Stay tune for more TH Marine tech tips. We're going to be providing these about once a week on our TH Marine Team YouTube channel. So stay tune. read less
Please be aware that all products have a production or warehouse lead time. This is the number of business days (typically not including the day the product was ordered) that must pass before the item begins the shipping process. Please see the "Ships: In" information located within the main product description to the right of the product image and below the ADD TO CART button for that particular product's "Ships: In" timeframe.
IMPORTANT: Please note that these timeframes are estimates only based on the latest information provided to us by the manufacturer/supplier. Delays in both material, production and shipping timeframes by manufacturers can vary without advanced notice and while we do our best to keep "Ships: In" timeframes up to date we may not always be able to do so due to a variety of factors.
If a product is needed by a specific date we strongly recommend you reach out to our Sales team (1-800-869-1686) to verify shipping timeframes.
Canadian orders please add an additional 14 business days for processing and shipping. Alaska and Hawaii orders please add 1 additional warehouse processing day.
WARNING: Cancer and Reproductive Harm - www.P65Warnings.ca.gov .
Copyright © 2024 BOATING INVESTMENT GROUP LLC., - IBOATS. All rights reserved.